There is something so satisfying about rescuing a wobbly, rusty patio set from the brink. Metal patio furniture is one of the best candidates for a glow-up because the bones are usually solid, it just needs the right prep. If your chairs are flaking, your table has rust freckles, or you are simply tired of that faded bronze finish, this is the exact process I use on porches and patios to get a smooth, long-lasting repaint.
Quick Safety Notes
Before you dive in, a few things that keep this project safe and drama-free:
- Work outside or in serious ventilation. Spray products and solvents need fresh air, period.
- Use the right PPE. Gloves and eye protection are a must. For sanding, wear a particulate respirator. For spraying, use a respirator rated for paint fumes as recommended by your product label.
- Older paint may contain lead. If your furniture is truly vintage and the paint history is unknown, test before sanding. Follow local guidance for lead-safe work practices.
- Bleach warning. Never mix bleach with other cleaners. Protect plants and nearby surfaces, and consider oxygen bleach if you prefer a gentler outdoor option.
Before You Start: What Metal Is It?
Most outdoor sets fall into one of these categories. Knowing what you have helps you pick the right prep and primer.
- Wrought iron or steel: Heavy, usually magnetic, and most prone to rust. Many “wrought iron” patio sets are actually mild steel, so rust prevention still matters.
- Cast aluminum: Lighter than iron. It will not develop iron rust, but it can oxidize or corrode and get chalky. It still needs sanding and a bonding or etching-friendly primer labeled for aluminum.
- Tubular steel: Common for bistro sets and stackable chairs. Check seams and joints carefully because rust likes to hide there.
If a magnet sticks, it usually indicates steel or iron, but it is not foolproof. Some stainless parts can be magnetic, and some pieces are mixed-metal, so use it as a clue, not the whole story.
Supplies I Actually Use
You can do this with basics, but the right tools make it faster and the finish smoother.
Cleaning and prep
- Dish soap or a degreasing cleaner
- Scrub brush and microfiber rags
- Hose or bucket of clean water
- Painter’s tape and plastic sheeting or a drop cloth
- Nitrile gloves, eye protection, and a properly rated mask or respirator (especially for sanding and spray paint)
Rust removal and sanding
- Wire brush and or wire wheel attachment for a drill
- Sandpaper: 80 to 120 grit (rust and peeling paint), then 180 to 220 grit (smoothing)
- Sanding sponge (great for curves and ornate details)
- Optional: rust remover gel or a rust converter for stubborn spots
Priming and painting
- Primer: Rust-inhibiting metal primer for steel and iron. For aluminum, choose a bonding or self-etching primer labeled for aluminum and metal.
- Paint: Exterior enamel spray paint made for metal, or brush-on exterior enamel if you prefer.
- Optional topcoat: exterior clear coat (only if it is compatible with your paint system)
My personal rule: if the furniture lives in full sun or gets rained on regularly, I do not skip primer. Primer is the “stick-to-it” layer that keeps your pretty color from chipping at the first scrape.
Compatibility reminder: Primer, paint, and clear coat should be part of a compatible system. Do not mix products unless labels say they can play nicely together, especially when swapping brands or switching between different enamel types.
Step 1: Set Up Your Work Zone
Pick a day that is dry, mild, and not too windy. If you are spraying, wind can pepper your fresh paint with dust and leaf bits in seconds.
- Aim for label-friendly conditions. Most products like moderate temps and lower humidity. Avoid extremes (very hot, very cold, or very humid) because they can cause slow cure, wrinkling, or dullness.
- Watch the clock. Evening dew and overnight moisture can mess with fresh coats. Plan so primer and paint have time to dry per the label before the temperature drops.
- Work in the shade if possible so paint does not flash-dry and turn gritty.
- Lay down a drop cloth and elevate pieces on scrap wood or small blocks so you can reach edges.
- If you are painting multiple chairs, give yourself an assembly line: clean zone, sanding zone, paint zone.
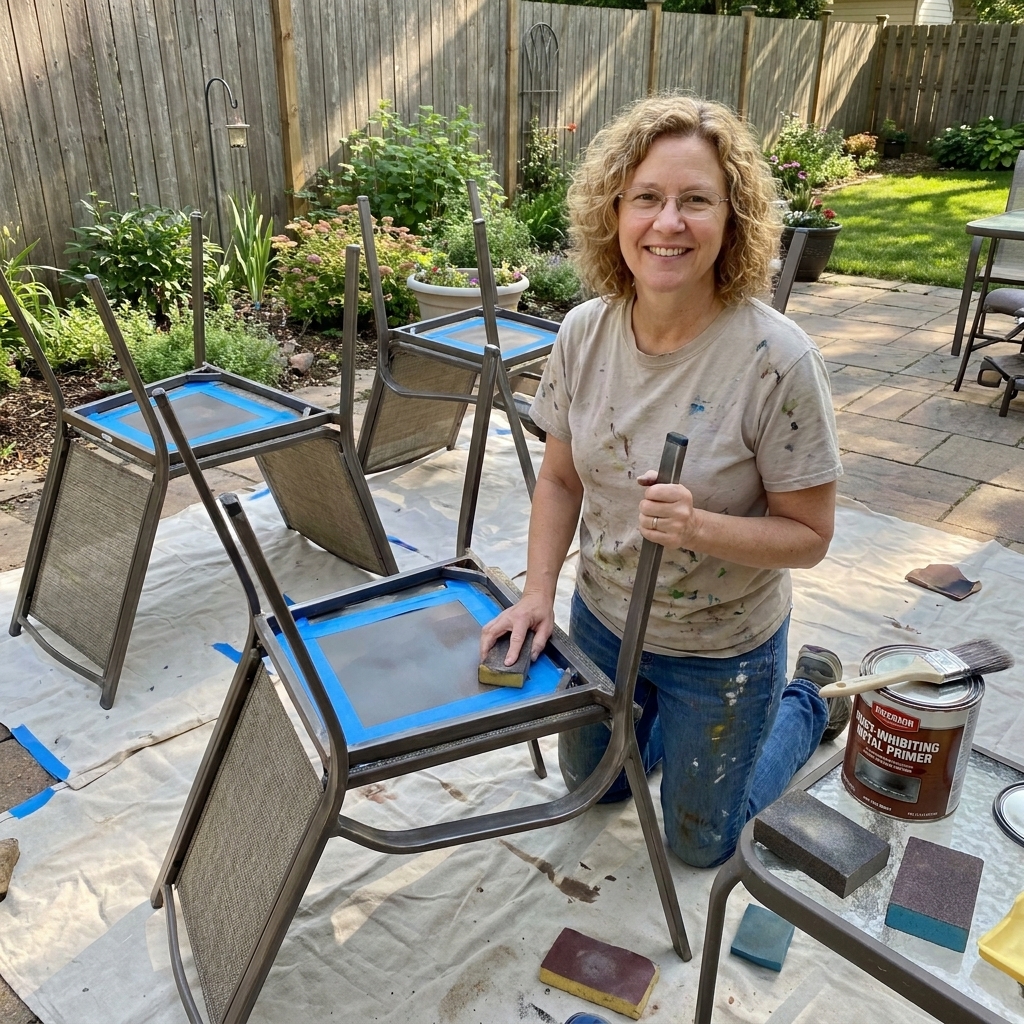
Step 2: Deep Clean
Paint hates dirt, pollen, and sunscreen residue. Even if the set looks clean, a good scrub makes a huge difference in adhesion.
- Wash with warm water and dish soap or a degreaser, especially on armrests and tabletops.
- Rinse thoroughly so no cleaner film remains.
- Let it dry completely. Trapped moisture under primer can cause bubbling later.
Porch Lush tip: If you have mildew in creases or under slats, a diluted bleach solution can help, but protect plants and nearby surfaces, never mix bleach with other cleaners, rinse extra well, and allow more drying time. Oxygen bleach is another good option for outdoor grime.
Step 3: Remove Loose Paint and Rust
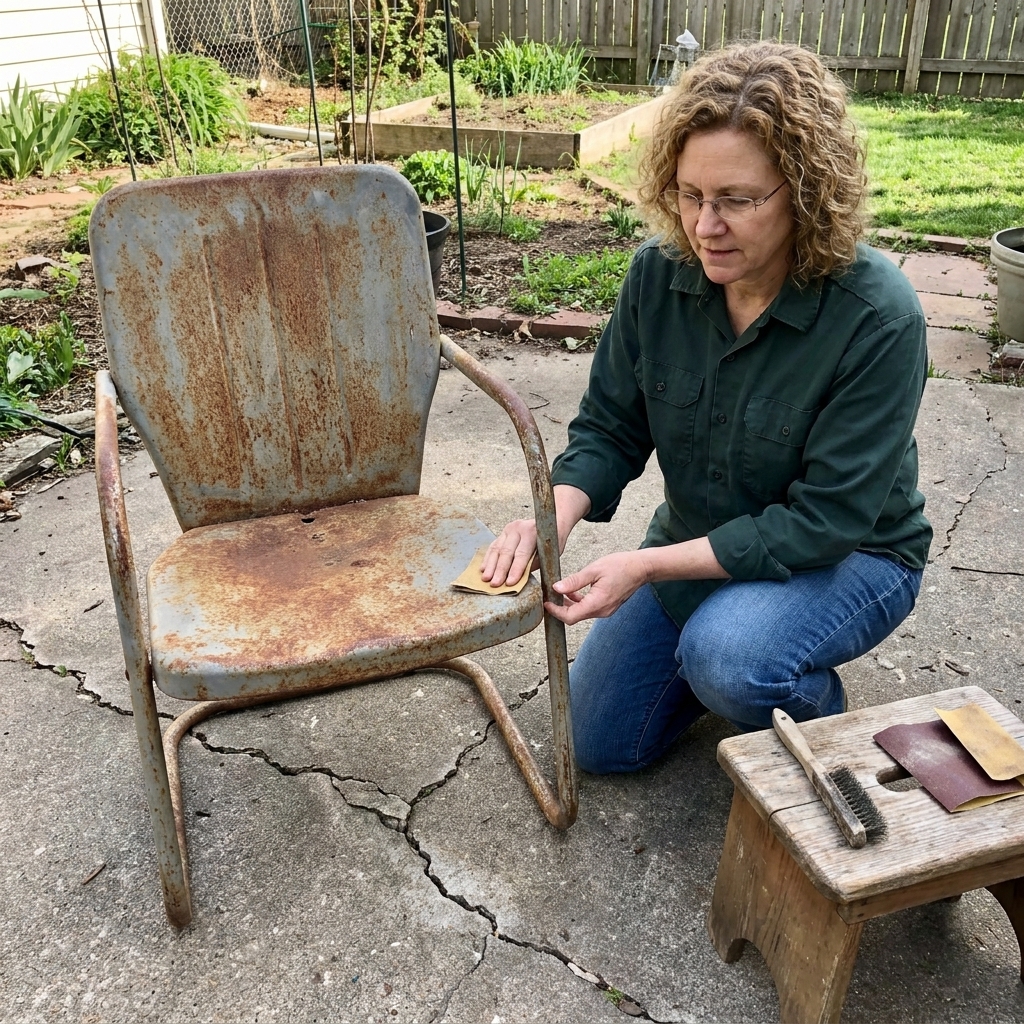
This is the step that makes your finish look “store-bought” instead of “quick weekend patch.” You do not always need to take it down to bare metal, but you do need to remove anything loose and flaky.
How far should you sand?
- Minor wear: If the old finish is mostly intact, scuff sanding is enough so primer can grip.
- Peeling paint: Sand until the edges are feathered smooth and nothing lifts when you scrape a fingernail across it.
- Rust: Remove rust down to solid metal wherever possible. At minimum, remove all powdery rust and scale.
- Chalky aluminum: Keep sanding and cleaning until the oxidation stops rubbing off on your rag. Primer will not bond well to loose chalk.
My sanding routine
- Start with 80 to 120 grit on rust and peeling areas.
- Switch to 180 to 220 grit to smooth and blend.
- Use a sanding sponge for decorative scrollwork and rounded edges.
If you run into rust that just will not quit in pits or seams, you have two options:
- Rust remover gel: Great for pitted rust. Follow the label carefully and rinse or wipe as directed.
- Rust converter: Converts remaining rust to a paintable surface. This can be a lifesaver on ornate iron where you cannot reach every nook.

Step 4: Remove Dust and Oils
Sanding dust is sneaky and it will ruin a smooth finish if it clings to the surface. After sanding:
- Brush off debris, then wipe with a damp cloth.
- Let it dry fully.
- For best adhesion, do a final wipe with a paint-prep solvent that is safe for metal, following all ventilation and safety instructions on the product.
Do not touch the cleaned surface with bare hands right before priming. Skin oils can cause fish-eyes in paint.
Step 5: Prime
Primer is where the “will it last?” magic happens. Use a primer specifically labeled for metal. For steel and iron, choose rust-inhibiting. For aluminum, use a bonding or self-etching primer labeled for aluminum and metal.
Spray primer tips
- Shake the can longer than you think you need to, then shake again between passes.
- Hold the can about 8 to 12 inches away.
- Use light coats. Heavy coats cause drips, and drips show forever on chair legs.
- Start spraying off the piece, sweep across, then release after you pass the edge.
How many coats?
Usually 1 to 2 light coats. If you have bare metal showing or you sanded aggressively, plan on two. Follow the recoat window on the can so your layers bond properly.
Let primer cure. Dry-to-touch is not the same as cured. Give it the time your specific label asks for, especially if humidity is high.
Step 6: Paint in Thin Coats
For patio furniture, I love an exterior enamel made for metal. It levels nicely and cures hard enough to handle stacking chairs, kids, and the occasional scraped sandal.
Spray paint vs brush paint
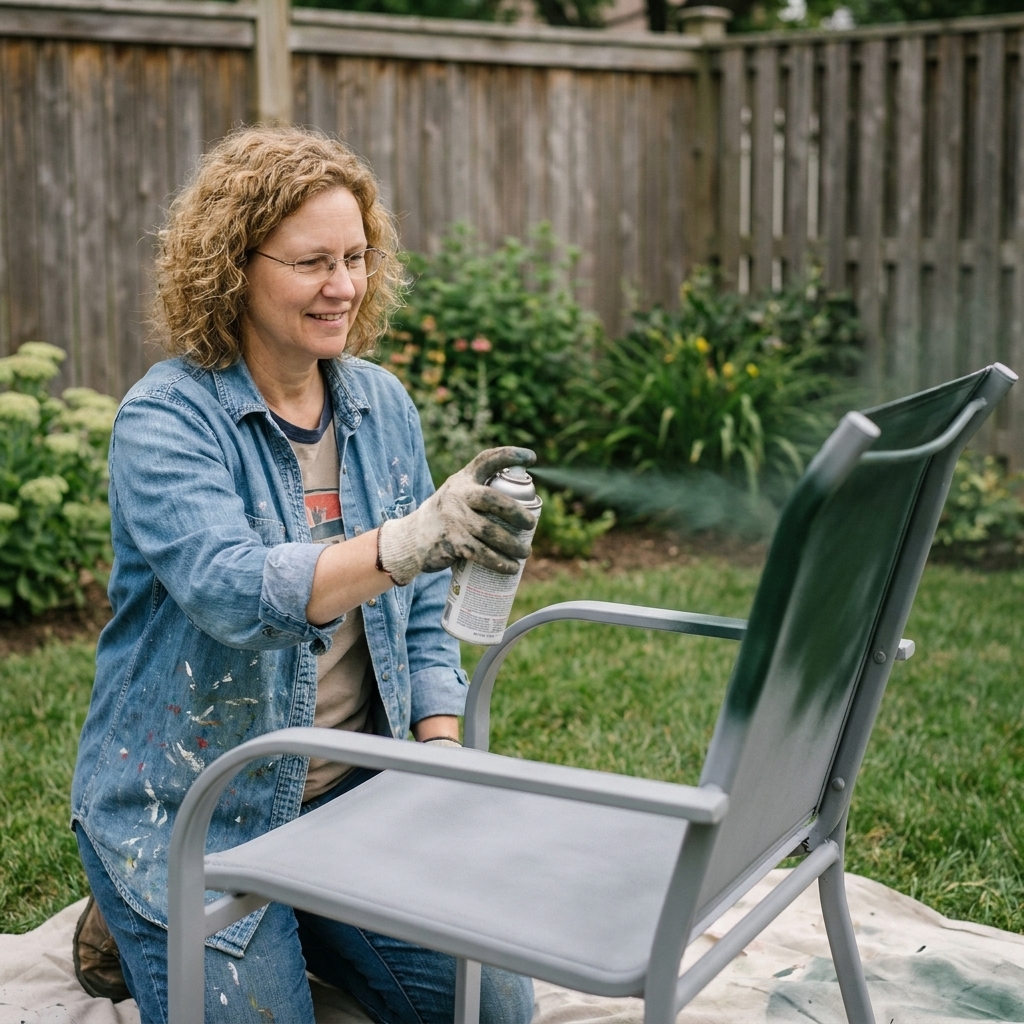
- Spray paint: Best for slats, mesh, and ornate details. Gives a smoother look with fewer brush marks.
- Brush-on enamel: Great for big flat tabletops and simple frames. More forgiving on windy days.
My go-to spray method
- First coat: a light tack coat. It looks a little speckled, that is fine.
- Second coat: fuller coverage, still thin enough to avoid drips.
- Third coat: only if needed for depth and uniform color.
Wait the recommended time between coats on your specific can. If you rush, paint can wrinkle. If you wait too long outside the recoat window, the next coat might not bond as well.
Step 7: Clear Coat (Optional)
A clear coat can add durability, but only when it is compatible with your paint. Some spray paints are designed as an all-in-one system and do not need a clear topcoat.
- Use a clear coat if: you want extra UV resistance, you chose a specialty finish that benefits from protection, or your furniture gets heavy use.
- Skip it if: your paint is already an exterior enamel and the label warns against topcoating, or you are mixing brands and cannot confirm compatibility.
If you do clear coat, use the same brand line as your paint when possible and apply it within the recommended recoat window.
Drying and Curing
It is tempting to set everything back on the porch the same afternoon. I get it. But curing time is what keeps your new finish from sticking to itself, scuffing, or imprinting.
- Dry to touch: often 30 minutes to a few hours (check your label).
- Handle carefully: often within 24 hours (check your label).
- Full cure: commonly 5 to 7 days for many enamels, sometimes longer in humidity (check your label).
If you can, wait a few days before stacking chairs, adding seat cushions, or sliding the table around. Treat it gently at first, like fresh nail polish for your patio set.
Fixes for Common Problems
Drips and runs
Let the paint dry, then sand the drip smooth with 220 grit and respray lightly. Trying to wipe a drip while wet usually creates a bigger mess.
Gritty texture
This is often wind, dust, heat, or spraying too far away so the paint dries midair. Lightly sand with 220 grit and apply another thin coat in calmer conditions.
Peeling paint after a week
Usually a prep or compatibility issue: grease, glossy surface not scuffed, no primer, or products that did not bond well together. Sand back the failing area until stable, clean, prime, and repaint with a confirmed compatible system.
Rust bleeding through
That means rust was left behind or seams were not treated. Sand the spot down, use a rust converter or rust-inhibiting primer, then repaint.
Color and Finish Ideas
Once your set is smooth and fresh, the fun part begins. A few foolproof looks I love on porches:
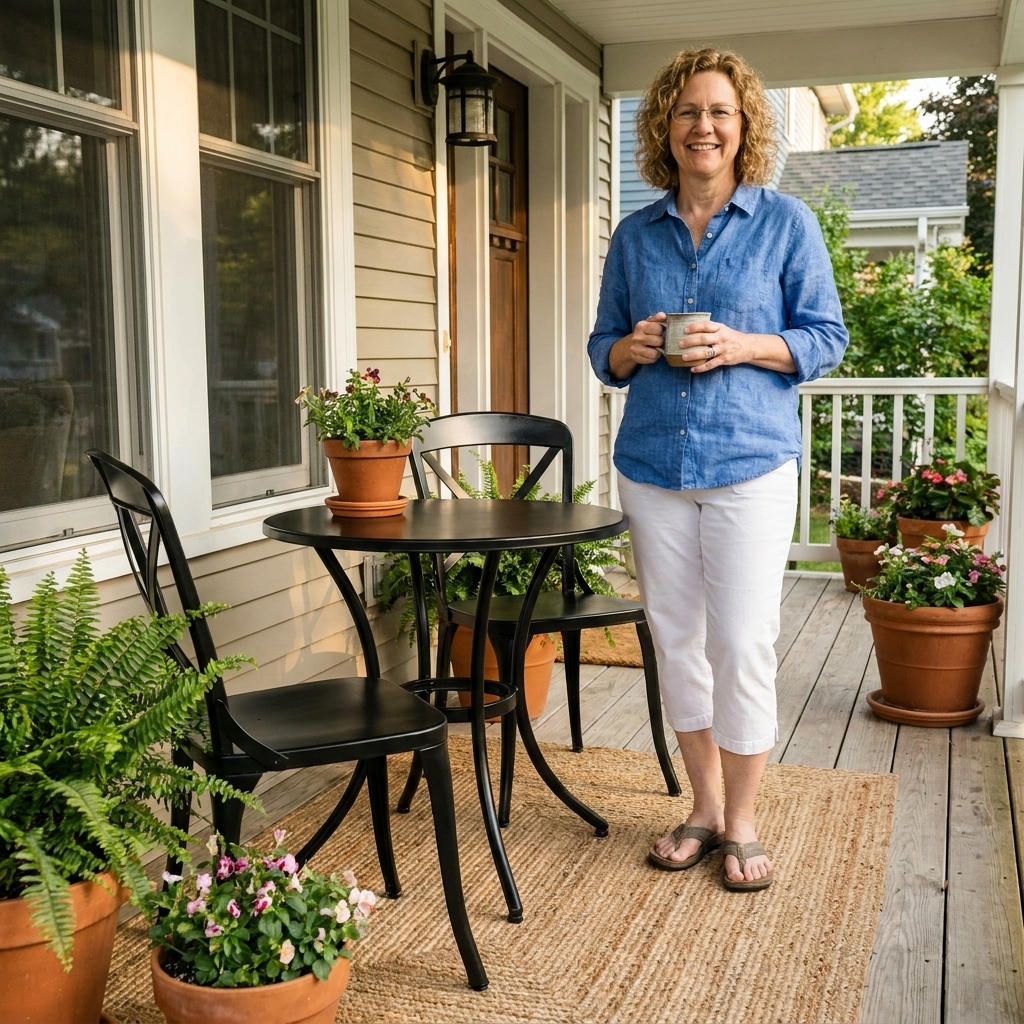
- Soft black satin: classic, hides imperfections, looks great with natural fiber rugs.
- Warm white: bright and happy, especially with striped cushions and lots of greenery.
- Sage or olive: a gentle, garden-friendly color that makes terracotta pots glow.
- Moody charcoal: modern, cozy, and very forgiving with outdoor grime.
Finish matters, too. Gloss shows every bump. Satin and semi-gloss are my sweet spot for outdoor metal because they are wipeable without looking too shiny.
Keep It Looking New
- Use felt pads or outdoor-safe rubber bumpers on chair feet if you have rough concrete.
- Touch up chips promptly. Bare metal is an invitation for rust.
- Store cushions separately and avoid dragging heavy pieces across the patio.
- If you can, cover the set during long rainy stretches or store it in a shed for winter.
A little maintenance turns a one-weekend project into a finish that lasts for years.
FAQ
Do I have to sand metal furniture before painting?
Yes, at least scuff sand. Paint needs tooth to grip. If there is rust or peeling paint, you will need more aggressive sanding or wire brushing first.
Can I paint over rust?
You can only paint over rust if you treat it first with a product designed for it, like a rust converter, and you remove loose rust. Painting straight over flaky rust usually fails quickly.
What paint is best for metal patio furniture?
Look for exterior enamel labeled for metal. Spray versions are great for chairs with lots of angles and details. Brush-on exterior enamel works well for simpler frames and tabletops.
Should I use a primer if I am using paint and primer in one?
On outdoor metal, I still recommend a dedicated metal primer, especially for steel and iron or anything with rust history. It is the best insurance for adhesion and rust resistance.
How long should I wait before using the furniture?
Follow your product label, but plan for at least 24 hours before light use and up to a week or more for full cure, depending on temperature and humidity. If you want the finish to stay pretty, curing time is your friend.
A Little Encouragement
If you are staring at a crusty old set thinking, “This is going to be a pain,” I promise the transformation is worth it. Take your time on prep, keep your coats thin, and let it cure properly. You will end up with patio furniture that feels fresh, personal, and ready for iced tea season.